
A solid blues scale tab is your roadmap to playing solos with some serious soul. It's a visual guide that cuts through the theory, showing you exactly which frets and strings to play. It turns abstract ideas into something you can do right now on your guitar.
Welcome to the heart and soul of authentic blues guitar. The blues scale isn't just a random handful of notes; it's the core language behind countless iconic solos, from B.B. King to Stevie Ray Vaughan. Getting this scale under your fingers is the first real step toward improvising with confidence and crafting licks that actually sound like the blues.
So, what gives this scale its signature, emotionally charged sound? It all comes down to one special ingredient: the blue note.
This note is the flat fifth (b5) of the scale. It's the secret sauce, creating a gritty, powerful tension that is instantly recognizable as the sound of the blues.
Think of the minor pentatonic scale as your sturdy, reliable foundation. Now, by adding that one blue note, you've introduced a touch of beautiful dissonance. It's the musical equivalent of a soulful crack in a singer's voice or a moment of raw feeling in a story. Learning how to use it is what separates players who sound like they're just running scales from those who are truly making music.
Let's break down the notes for the A Minor Blues scale. The formula is beautifully simple: it’s just the minor pentatonic with that one crucial "blue note" added in.
| Scale Degree | Formula | Note in A Minor Blues |
|---|---|---|
| Root | 1 | A |
| Minor Third | b3 | C |
| Perfect Fourth | 4 | D |
| Flat Fifth | b5 | Eb |
| Perfect Fifth | 5 | E |
| Minor Seventh | b7 | G |
This structure gives you everything you need: the minor third for that melancholic feel, the flat seventh for that cool, laid-back vibe, and of course, that all-important flat fifth for tension and grit.
This structure has been a cornerstone of guitar education for decades. Its straightforward pattern makes it an incredibly popular starting point for guitarists all over the world.
Ultimately, mastering the blues scale tab is about more than just memorizing shapes; it's about internalizing this sound so you can call upon it whenever you need to. For a deeper dive into how scales map across the entire neck, you might want to check out our lesson on the moveable sliding pentatonic scale.
This foundational knowledge will set you up perfectly for the fretboard diagrams we're about to get into.
If you really want to unlock your potential as a blues guitarist, you have to break free from that single "box" pattern where so many players get stuck. Seriously, the key to crafting solos that flow, travel, and actually tell a story is seeing the blues scale as one continuous map across the entire fretboard. This is how you go from just reciting memorized licks to having a real musical conversation.
The fretboard can look pretty intimidating at first, but the five blues scale positions are just different ways to play the same handful of notes in different spots on the neck. Once you learn how they connect, you’ve built a seamless highway for your improvisation. We'll use the A minor blues scale as our home base—it's a super common key and very friendly for guitarists just starting to map things out.
The concept is simple: each position, or "box," links directly to the next one like puzzle pieces. The highest notes of one position become the lowest notes of the next. Getting these shapes into your muscle memory is what separates the intermediate players from those who can navigate the neck without even thinking.
This map helps visualize how the core pieces of the blues scale—the notes, the critical 'blue note,' and the tablature—all lock together.
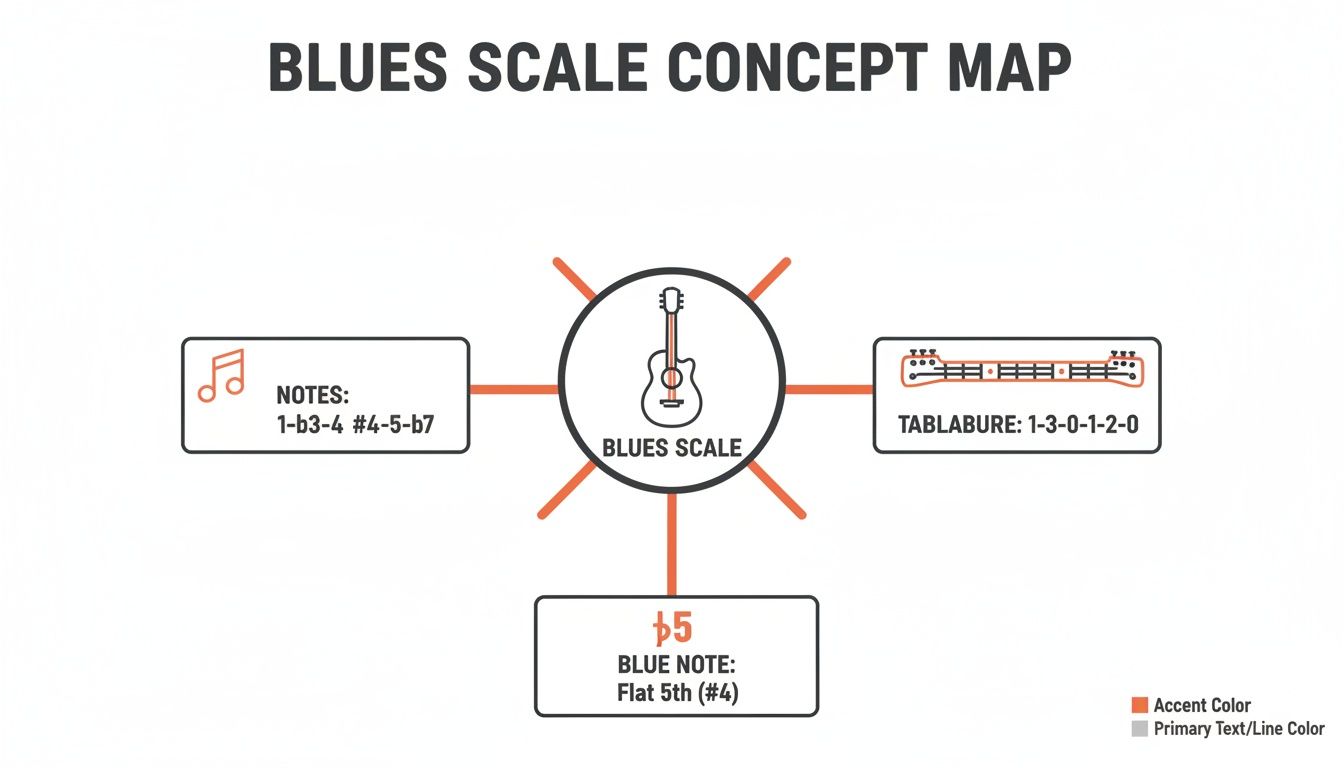
Seeing it this way shows that understanding the blues scale tab is all about connecting the theory with the practical feel of the notes under your fingers.
This is the one you probably already know. It's the most common and recognizable blues scale shape, often called the "home box." For the key of A, it's rooted right on the 5th fret of the low E string. Countless iconic blues licks from legends like Eric Clapton and B.B. King live right here.
A Minor Blues Scale - Position 1
e|-------------------------5-8-|
B|-------------------------5-8-|
G|---------------------5-7-----|
D|-----------------5-7---------|
A|---------5-6-7---------------|
E|-5-8-------------------------|
As you play this, get familiar with where your root note 'A' is. You'll find it on the 5th fret of the low E string and the 7th fret of the D string. Always know where your roots are—they're your home base, your safe havens to resolve a phrase.
Moving up the neck, Position 2 picks up right where Position 1 leaves off. The lowest notes in this pattern are the exact same notes as the highest ones from the first box. This shape is perfect for sliding into new phrases and gives you a whole different set of expressive string bends.
A Minor Blues Scale - Position 2
e|--------------------------8-10-|
B|---------------------8-10------|
G|-----------------7-9-----------|
D|-------------7-9---------------|
A|-------7-8-10------------------|
E|-8-10--------------------------|
Here, your root note 'A' is hiding on the 10th fret of the B string. Try to practice moving fluidly from the 8th fret on the high E string in Position 1 right into this new shape.
Pro Tip: Don't just run scales up and down like a robot. Try playing "three-note licks" within each position. Just pick three notes that are close together and create tiny melodic ideas. This trains your ears to hear music instead of just patterns, which is a huge step toward sounding like you know what you're doing.
Position 3 sits comfortably in the middle of the neck and offers some of the best opportunities for those soulful, screaming string bends, especially on the G and B strings. This is a go-to spot for tons of players when they want to crank up the intensity in a solo.
A Minor Blues Scale - Position 3
e|-----------------------------10-12-|
B|------------------------10-13------|
G|--------------------9-12-----------|
D|---------------9-10----------------|
A|---------10-12---------------------|
E|-10-12-----------------------------|
You'll find your 'A' root notes on the 10th fret of the B string and the 12th fret of the A string. This position is a real powerhouse for building tension and release.
Position 4 is what connects the upper part of the neck back toward the middle. It's a slightly less intuitive shape for some folks, but mastering it is absolutely crucial for complete fretboard freedom. It also contains some really useful note combinations for creating cool descending licks.
A Minor Blues Scale - Position 4
e|-----------------------------12-15-|
B|------------------------13-15------|
G|-------------------12-14-----------|
D|-------------12-14-----------------|
A|-------12-13-----------------------|
E|-12-15-----------------------------|
The root note 'A' is located at the 12th fret of the A string and the 15th fret of the low E string (which is just the open A string, two octaves higher).
Finally, Position 5 brings us back home. It connects the highest part of the neck to an octave of Position 1, which starts up on the 17th fret. This shape is fantastic for high-energy licks and screaming bends that can put the perfect exclamation point on a solo.
A Minor Blues Scale - Position 5
e|-----------------------------15-17-|
B|------------------------15-17------|
G|-------------------14-16-----------|
D|-------------14-17-----------------|
A|-------13-15-----------------------|
E|-15-17-----------------------------|
Your 'A' root is on the 17th fret of the B string. Notice how the notes on the 17th fret line up perfectly to start Position 1 all over again, just an octave higher. The fretboard is a circle!
Learning these five positions is a massive step. But the real magic happens when you stop seeing them as five separate boxes and start seeing them as one large, interconnected scale. For a deeper dive on this, our article on developing horizontal vision for the pentatonic scale has some fantastic exercises that apply directly to the blues scale, too.
To start connecting them, try this simple drill:
This drill builds muscle memory, but more importantly, it trains your brain to see the pathways between the shapes. With a little practice, the lines between the boxes will blur, and the entire fretboard will open up as your personal playground for bluesy expression.
Alright, you’ve put in the work and memorized the five positions of the blues scale. That’s a huge first step. But knowing the scale shapes is like knowing the alphabet—it's essential, but it doesn't automatically make you a great storyteller.
The real magic happens when you start forming words and sentences with those notes. For us guitar players, that means crafting licks and phrases. This is where you transform the raw notes from a blues scale tab into music that breathes, cries, and sings.
Making your guitar "talk" comes down to one thing: phrasing. It's the art of shaping notes using all the good stuff—string bends, slides, vibrato, hammer-ons, and pull-offs. These techniques are what separate a robotic scale run from a soulful, vocal-like melody. A single note can scream or whisper, all depending on how you attack it, hold it, and let it go.
So, let's dig into some classic licks using the A minor blues scale positions you've been practicing. We won't just look at the tabs. We'll break down the phrasing that gives each lick its unique character and power.
This one is pure blues gold, living entirely within Position 1. It’s a staple you'll hear in countless tunes, and it’s perfect for wrapping up a 12-bar cycle or setting up a smooth transition back to the root chord.
A Minor Blues Lick 1
e|-----------------|
B|--8b10~---5------|
G|------------7-5--|
D|-----------------|
A|-----------------|
E|-----------------|
Breaking Down the Phrasing:
Here’s a great example of how to connect scale positions without it sounding clunky. This lick starts in a familiar spot and then slides up the neck to explore new territory, making your solo feel more dynamic and less stuck in one box.
A Minor Blues Lick 2
e|----------------------|
B|----------------------|
G|--7-5-----------------|
D|------7-5-------------|
A|----------7/9~--5-----|
E|----------------------|
Breaking Down the Phrasing:
To really get a feel for this stuff, you have to listen. Pay attention to how a master like B.B. King could say more with one or two perfectly phrased notes than most players can with a dozen. It's all about economy and emotion, not just a flurry of notes.
Stevie Ray Vaughan was the king of aggressive, powerful phrasing. This lick brings in a string rake, where you drag the pick across muted strings for a gritty, percussive attack that leads right into a screaming bend. It’s pure attitude.
A Minor Blues Lick 3
e|------------------12b14~-|
B|---------x--13-----------|
G|------x------------------|
D|---x---------------------|
A|-------------------------|
E|-------------------------|
Breaking Down the Phrasing:
At its core, the blues is a conversation. A fantastic way to practice this is with "call and response," where you play a short musical question (the call) and then follow it up with an answer. This lick shows you a simple way to do that within a single phrase.
A Minor Blues Lick 4
e|-------------------|-------------------|
B|--5-8-5------------|-------------------|
G|--------7~---------|--5----------------|
D|-------------------|----7-5------------|
A|-------------------|--------7----------|
E|-------------------|-------------------|
Breaking Down the Phrasing:
Ultimately, the goal is to absorb these ideas—the bends, the slides, the rhythmic concepts—so you can start mixing and matching them on the fly. Don't just copy the licks note-for-note; steal the ideas behind them. That’s the real secret to moving beyond playing a blues scale tab and actually speaking the language of the blues.
So, you've mapped out the five positions and picked up a few killer licks. Awesome. Now for the most important part: how do you get all this stuff out of your head and into your fingers so it becomes automatic?
The answer is a smart, consistent practice routine. This isn't about grinding away for hours on end; it's about making the time you do spend really count.

Real fluency with the blues scale tab happens when you bridge the gap between just running exercises and actually making music. We've got to build muscle memory, lock in our timing, and train our ears to speak the language of the blues. This routine is designed to do exactly that, turning those scale shapes into your go-to tools for improvisation.
First things first: your timing has to be rock-solid. The metronome is your best friend here. Don't think of it as a robotic chore—think of it as the honest coach who will build you an unshakeable rhythmic foundation.
Set it to a slow tempo, maybe around 60 BPM. The goal here is precision, not shredding. Play through each of the five blues scale positions, up and down, with one note per click.
This isn't just a finger exercise. You're internalizing the pulse. After a few weeks of this, you'll feel a new level of groove and confidence in your solos.
Running scales up and down is great for muscle memory, but let's be honest, nobody wants to hear a solo that sounds like a warm-up exercise. The next step is to break out of that linear, ladder-climbing approach by practicing melodic sequences. This forces your brain and fingers to think in musical phrases instead of just sterile patterns.
Try this simple but powerful drill: the "groups of three" sequence. Instead of playing 1-2-3-4-5-6, you play 1-2-3, then shift up to start on the second note and play 2-3-4, then 3-4-5, and so on up the scale. It’s a game-changer for breaking those robotic habits.
Another fantastic exercise is to play the entire scale on just a single string. This forces you to see the connections horizontally up and down the neck, a crucial skill for finally breaking out of those "box" shapes.
Expert Insight: The fastest way to sound musical is to stop thinking about the whole scale. Seriously. Pick just three adjacent notes from a single blues scale tab position and try to create music with only those notes over a backing track. This limitation forces you to get creative with rhythm, phrasing, and space—the things that truly make a solo sing.
Okay, time to put it all together. All the theory and exercises in the world don't mean a thing until you use them in a real musical situation. This is where backing tracks become your personal jam session, giving you the chord changes and rhythmic feel to paint over.
Here’s how to make your jam track time truly effective:
This kind of focused practice does so much more than just help you memorize notes; it builds your ear and your musical intuition. For a deeper dive, check out these 15 reasons why practicing guitar scales is so important.
To give you a clearer idea of how to structure your week, here’s a sample schedule.
This is just a template, of course. Feel free to adjust the days and durations to fit your own schedule. The key is consistency!
| Day | Focus Area | Duration |
|---|---|---|
| Monday | Metronome Work (Positions 1 & 2) | 15 minutes |
| Tuesday | Melodic Sequences (Groups of 3) | 15 minutes |
| Wednesday | Backing Track Jam (Position 1 only) | 20 minutes |
| Thursday | Metronome Work (Positions 3, 4, & 5) | 15 minutes |
| Friday | Single-String Practice & Lick Creation | 15 minutes |
| Saturday | Backing Track Jam (Connecting positions) | 20 minutes |
| Sunday | Rest / Listen to Blues Masters | N/A |
Sticking to a routine like this is what turns frustrating practice into real freedom on the fretboard. It’s the path to making the guitar an extension of your musical voice.
Sooner or later, every guitarist hits the same wall. You’ve drilled the blues scale tab for all five positions, you know the patterns inside and out, but your solos just… sound like patterns. They feel predictable, maybe even a little robotic.
Don't sweat it. This is a rite of passage for every improviser. The trick is knowing how to spot these common traps so you can leap right over them.

This is where we turn those hurdles into breakthroughs. We’re going to look at some road-tested, practical ways to stop sounding like someone running exercises and start sounding like a player with something to say.
The biggest trap of all is getting stuck in that first position "box." It's comfortable, it's familiar, and it’s a creative prison. Stick with it too long, and all your solos will start to sound exactly the same. The real goal is to see the fretboard not as five separate neighborhoods, but as one big, connected highway.
A great way to start is by forcing yourself to connect the patterns. Try playing a short phrase in Position 1, then immediately slide into Position 2 to finish the thought. This simple move trains your hands and your brain to see the pathways between the boxes, which is the key to unlocking the entire neck.
Expert Insight: Here’s a killer exercise to force creativity. Limit yourself to just two or three notes from the scale. Seriously. Try to build a whole solo using only the notes on the G and B strings. This limitation makes you focus on rhythm, feel, and phrasing—the stuff that really makes a solo sing.
Another classic pitfall is what I call "aimless noodling." It's that stream of notes that doesn't seem to be going anywhere, with no real story or direction. This happens when our fingers are moving, but our musical brain is switched off.
To snap out of it, think in terms of "call and response." Play a short, simple musical question (the call). Pause. Then play an answering phrase (the response). This simple framework gives your solos immediate structure and purpose, turning a random string of notes into a real musical conversation.
That flat fifth—the "blue note"—is the secret ingredient in the blues scale. But it's so easy to overuse. If you lean on it too heavily, it loses its spicy, dissonant power and just becomes a crutch. Think of it like a potent hot sauce; a little goes a very long way.
Instead of landing on it and holding it, try using it as a passing tone. Play it quickly on your way to a more stable note, like the root or the fourth. This creates a quick, delicious moment of tension that instantly resolves, making your phrases sound way more mature and impactful. Learning to sidestep common issues like this is a massive part of your growth. For more on this, check out this great article on the seven mistakes beginner guitarists often make.
Finally, don't get stuck in a rhythmic rut. It's so easy to fall into the trap of playing endless streams of eighth notes, but the best blues solos breathe. They have swing and a deep sense of feel that comes from rhythmic variety.
Throw on a backing track and consciously work on this. Play long, sustained notes that cry out. Follow that with a quick flurry of faster notes. And most importantly, embrace silence. The notes you don't play are often just as powerful as the ones you do.
Alright, you've got the roadmap. We’ve broken down the blues scale, laid out all five positions on the fretboard, and even armed you with some classic licks and a solid plan to get them under your fingers. But this is just the starting line, not the finish.
Think of the scales and licks in this guide as your vocabulary. Now it’s time to start having real musical conversations. The best way to do that? Go listen—I mean really listen—to the masters. Put on some B.B. King, Albert King, or Stevie Ray Vaughan and you'll hear how they used these very same notes to pour pure emotion into their playing.
The most important part of this whole journey is just doing it. Fire up some backing tracks and start experimenting. Don't worry about hitting a wrong note here and there; those "mistakes" are where the real learning happens. Let your own voice start to peek through the patterns.
If you're ready to take your playing to the next level with some of the best instructors on the planet, you should check out the massive library of blues courses and interactive tools available with a TrueFire All Access Trial.
Here are a few of the most common questions that pop up when guitarists first start digging into the blues scale tab and trying to make it their own.
Think of the blues scale as the minor pentatonic's rowdier, more soulful cousin. It's the exact same scale, but with one extra note thrown in for spice: the flat fifth (b5), better known as the legendary "blue note."
Let's look at it in the key of A:
That one little Eb is where all the magic happens. It’s the source of that gritty, tense, and deeply emotional flavor that screams "blues." It's the secret ingredient that gives your licks that unmistakable, gut-punch quality.
Not only can you, but you have to! This is the absolute cornerstone of an authentic blues sound. Playing the A minor blues scale over a standard 12-bar blues in A major is precisely what creates that beautifully raw, clashing vibe we all love.
Here's what's happening under the hood: when you play a C note (the minor third) from your A minor blues scale over an A7 chord, it rubs against the C# (the major third) that's actually in the chord. That very specific tension is what makes blues guitar sound so raw and full of feeling. It’s perfect.
First off, get completely comfortable in Position 1. Make it your home base. It’s the starting point for countless classic licks, and it’s where most players feel the most grounded.
Once you have that down, the real trick is to stop thinking of the five positions as separate, rigid "boxes" on the neck. They aren't isolated islands.
Instead, start seeing them as interconnected pathways that map out the entire fretboard. A great way to practice this is by playing a phrase in Position 1 and then sliding up to continue the idea in Position 2. The pros don't see boxes; they see one big, seamless scale across the whole neck. Your goal is to make the jump between shapes feel just as smooth and natural as moving within a single position.
Ready to go deeper? To learn from some of the best players on the planet, check out the thousands of blues courses, jam tracks, and interactive blues scale tab lessons included with a TrueFire All Access Trial.
