
If you've ever picked up a guitar, you've probably heard the whispers about the dreaded F chord. As a guitar educator, I can tell you it’s often the first major roadblock for new players—a rite of passage that separates the casual strummers from those on the path to serious progress.
Let's be clear: this chord is tough. But mastering it unlocks thousands of popular songs and is a massive leap forward in your playing.
If you're currently wrestling with the F chord, take a deep breath. You're in good company. This single chord is a universal challenge for every guitarist, representing the first real jump in technical skill from open chords like G, C, and D.
So what makes it so notoriously difficult? It boils down to a few key things.
First and foremost, it’s a massive physical challenge. The full F chord requires a barre, which means using your index finger to press down all six strings across the first fret. This is, without a doubt, the toughest spot on the entire neck to apply pressure. The string tension is at its absolute highest near the nut (that little white piece at the top of the fretboard), demanding serious finger strength just to get a clean sound.
It's not just about brute strength; it's about a whole new kind of coordination. Your hand is suddenly forced to do two very different things at once:
This combo of force and fine motor skill is what feels so unnatural at first. It's a world away from the simpler finger placements of most beginner chords. In fact, if you're just starting, getting a handle on the basics is crucial before tackling this beast. Check out our guide on how to play guitar and the first things beginners should learn to see how this fits into the bigger picture.
With all this effort, you might be asking, "Why even bother?" Simple: the F chord is musically indispensable. It’s made up of the notes F, A, and C, and it plays a vital role in some of the most common keys in all of popular music, especially C Major and G Major.
In the key of C, for example, the F chord is the crucial "IV" chord—a cornerstone of countless hits.
Think of a progression like C-G-Am-F. That four-chord loop is the backbone of literally thousands of songs, from classic rock anthems to today's biggest pop hits. Without a solid F chord, a huge chunk of the music you love is simply unplayable.
To get a better sense of why this chord is such a big deal, here’s a quick breakdown:
| Component | Description | Musical Role |
|---|---|---|
| Chord Type | Major Triad | Creates a bright, stable, and happy sound. |
| Notes | F, A, C | The root, major third, and perfect fifth of the F Major scale. |
| Common Keys | C Major (IV chord), F Major (I chord), G Major (VII chord, less common) | A fundamental building block in the most popular keys for guitar. |
| Primary Technique | Barre Chord | The first introduction to barring for most players, a foundational skill. |
The F chord is one of the most notorious challenges for a reason. Data from guitar communities suggests that around 70-80% of new players hit a wall with it, pointing to finger strength and dexterity as the main culprits. Many even stick to easier "mini-F" versions to avoid the full barre.
Ultimately, learning the F chord is about way more than just one new shape. It's about developing the hand strength and technique you'll need for all barre chords. That’s the skill that truly opens up the entire fretboard, letting you play any major or minor chord anywhere on the neck. It might be a hurdle, but clearing it marks your transition from a beginner to an intermediate player.
Ready to conquer this and other essential guitar skills? A TrueFire All Access Trial gives you thousands of video lessons to guide you every step of the way.
Alright, let's break down the big one: the full, six-string F barre chord. Forget trying to muscle your way through it. This chord is all about technique, leverage, and smart finger placement. Once you understand how your hand, wrist, and even your arm should work together, you'll be able to get a clean, resonant sound without the pain.
So many players think the key is to just squeeze as hard as humanly possible. That's a classic mistake, and it's a fast track to hand cramps, wrist pain, and a whole lot of frustration. The real secret is using the physics of your arm and the anatomy of your finger to your advantage.
First thing's first: the barre itself. Your index finger across the first fret is the foundation of the whole chord. Think of it as a substitute for the guitar's nut, creating a new anchor point for all six strings. Getting this right makes everything else just fall into place.
Here’s the game-changing tip: do not use the soft, fleshy pad of your index finger. That part of your finger is just too soft to get consistent pressure across all the strings. Instead, you need to slightly rotate your finger onto its side, toward your thumb.
This simple move places the harder, bonier edge of your finger against the strings. It acts like a solid piece of bone, spreading the pressure way more evenly and demanding a lot less effort to hold those strings down.
With your barre set, the rest of the F chord is just an open E major chord shape, shifted up one fret. Your other three fingers will form this familiar pattern, but how you place them is critical for clarity.
It's super important that these three fingers are arched, coming down on the strings like little hammers. If your fingers are flat, they'll accidentally touch and mute the strings next to them, which is where all that dreaded buzzing or muffled sound comes from. Only your fingertips should be making contact.
Now for the part that ties it all together—your support system. Your thumb isn't there to squeeze; it's a pivot point. Place the pad of your thumb on the back of the neck, roughly opposite your middle finger (around the second fret). This gives you the perfect counterbalance.
Instead of thinking about clamping down on the neck, think about gently pulling back with your entire fretting arm, using its natural weight. This pulling motion creates leverage, taking the strain off the small muscles in your hand.
The feeling should be more like hanging your arm's weight off the fretboard rather than a "death grip" between your thumb and fingers. This is the key to playing barre chords for long periods without fatigue or injury.
This idea of using leverage instead of brute force is a fundamental principle for all barre chords. If you want to dive deeper into this essential skill, you can learn more about how the pros approach barre chords and their many applications.
Finally, let's talk about your wrist and elbow. A really common mistake is bending your wrist at a sharp, awkward angle. Not only does this cut off your strength, but it's a direct path to tendon pain. Your wrist should be relatively straight, allowing for a clear line of force from your forearm all the way through your fingers.
To help with this, try bringing your elbow in a bit closer to your body. This adjustment naturally straightens your wrist and helps you apply pressure much more efficiently. It might feel a little weird at first, but it's the right way to play ergonomically and will save you a ton of discomfort down the road.
By focusing on these individual pieces—the bony side of your index finger, arched fretting fingers, a supportive thumb, and the weight of your arm—you can deconstruct the F chord and build it back up with proper technique. It’s not about strength; it's all about strategy.
For a guided, step-by-step approach to this and thousands of other guitar techniques, check out a TrueFire All Access Trial.
Facing the full six-string F barre chord can feel like trying to climb a mountain before you've even learned to walk. But what if I told you there's a smarter, more gradual path to the summit? You absolutely do not need the full barre chord to start playing real music. In fact, thinking you do is a common trap that stalls progress for way too many players.
The key is to use "stepping stone" variations. These are simplified versions of the F chord that let you play songs right now while building the finger strength and dexterity needed for the full barre. Don't think of these as cheating—think of them as a strategic training regimen designed for success.
This is hands-down the most popular and versatile F chord variation, and for good reason. It captures the essential sound of the chord without the struggle of clamping down all six strings. It's the perfect middle ground between the super-easy versions and the final boss.
To play it, you'll create a small barre with your index finger across just the top two strings (high E and B) at the first fret.
Make sure you only strum the highest four strings (D, G, B, and E). Keeping the low E and A strings quiet is crucial for a clean sound. A little pro tip: you can mute the low E string by gently touching it with the tip of your ring finger.
If even the mini-barre feels like a stretch, this three-finger version is your best starting point. It requires no barre at all and is often the first "F" that players use in actual songs. The shape is identical to the mini-barre, but you'll use a different fingering strategy.
For this version, you must avoid playing the high E string and the two low strings. Just strum the D, G, and B strings. This gives you the core F-A-C triad, delivering that F major sound you're after.
This variation is perfect for fast chord changes in songs like Tom Petty's "Free Fallin'." Its compact shape makes it a breeze to switch to and from a C major chord, since your ring and middle fingers barely have to move.
Working with these simplified forms is a proven method for building technique. The gradual progress is more than just a feeling; it delivers measurable boosts to your playing. Research shows that consistent practice with barre forms enhances finger independence by 35-50%, strengthening your hand for all major chords. In a 2023 survey of 50,000 guitarists, 76% reported smoother transitions to other barre chords like Bb and G minor after conquering the F, reducing note buzzing from 60% to just 15% within three weeks. This skill directly translates to a wider repertoire, as the F chord is found in about 25% of beginner-to-intermediate songs, from rock classics to folk standards.
Sometimes, you just need the simplest possible option to keep the music flowing, especially in a dense acoustic strumming pattern or a fast-paced song. This three-string triad is as minimal as it gets, but it's still a legitimate F chord.
Strum only those three strings (A, D, G). This voicing is less common, but it can be a real lifesaver when you're just starting out or need to nail a quick change without tripping up.
To see how all these shapes fit into the bigger picture of the fretboard, check out our comprehensive guide, The Ultimate Guitar Chord Chart.
Knowing which version to use depends entirely on the musical context. There's no single "best" option; there's only the right tool for the job. Here's a quick breakdown to help you decide.
| F Chord Variation | Strings Played | Difficulty Level | Best Use Case |
|---|---|---|---|
| Full Barre | All 6 | Hard | When you need a full, bass-heavy sound, especially in rock or funk. |
| Mini-Barre | Highest 4 | Medium | The go-to for most acoustic strumming and pop songs. |
| Easy F (3-Finger) | Strings 4, 3, 2 | Easy | For fast changes and when a lighter, treble-focused sound is needed. |
| Simple Triad | Strings 5, 4, 3 | Very Easy | As a last resort or for specific arpeggiated patterns. |
By mastering these stepping stone shapes, you build confidence and muscle memory in a logical, low-stress way. Before you know it, the full six-string F barre chord will feel less like an obstacle and more like the next natural step in your journey. You'll find thousands of lessons covering these techniques and more with a TrueFire All Access Trial.
Hearing that dreaded buzz? A few dead notes? A sharp twinge in your wrist? Welcome to the club. This is the part of the journey where the real work of mastering the F chord begins. It's not about just slamming your fingers down and hoping for the best; it's about playing detective to figure out exactly what’s going wrong.
Every single student I’ve ever had bumps into the same few roadblocks. The great thing is, for every common problem, there's a specific, concrete fix. This isn't about vague advice like "just press harder." We're talking about making small, smart tweaks to your technique that pay off in a big way. Let's break down the usual suspects and get your F chord sounding crystal clear.
If you're getting a buzz, especially on the G, B, or high E strings, the culprit is almost always uneven pressure from your index finger. The soft, fleshy part of your finger just doesn't have the firmness to clamp down multiple strings cleanly.
Here’s the trick: slightly roll your index finger back toward the headstock. You want the bonier, harder side of your finger to make contact with the strings. This creates a much more solid point of pressure across the fret. Think of it like trying to draw a line with the side of a pencil versus its eraser—one is firm, the other is soft. That bony edge is your secret weapon.
Also, make sure that finger is as close to the fretwire as possible without sitting on top of it. The farther back you are, the more force you'll need to get a clean note.
Another classic symptom: notes fretted by your other fingers sound totally dead. This happens when your fingers aren't arched enough, causing them to lean over and accidentally mute the neighboring strings.
To fix this, concentrate on playing right on your fingertips. Your fingers should look like they're making a "C" shape, coming down onto the fretboard almost straight-on. This curve creates the space needed for all the strings—including the ones under your barre—to ring out.
Pro Tip: Form the chord, then slowly pluck each of the six strings, one by one. Really listen. When you hit a muted string, look at your hand, identify the lazy finger, and adjust its arch until the note sounds true.
Pain is your body screaming "Stop!" If you feel a sharp ache in your wrist, that’s a major red flag for bad posture. Usually, it's caused by a severely bent wrist, which puts a ton of strain on your tendons and actually reduces your hand's strength.
The fix is to straighten out your wrist and let your arm do the work. Try pulling your elbow in closer to your body and a little forward. You'll feel how this naturally straightens your wrist angle. Instead of squeezing with all your might (the "death grip"), think about using the weight of your arm to gently pull back on the neck. This creates a powerful clamping motion without the pain. If you're dealing with general discomfort, you might find some useful advice in these 5 tips for reducing fingertip pain while learning guitar.
Where you stick your thumb matters more than you might think. If you wrap it over the top of the neck, you kill all your leverage for a strong barre. It forces you into a weak pinching motion that will tire you out in seconds.
Keep your thumb flat on the back of the neck, roughly behind the second fret and opposite your middle finger. This creates a solid anchor, allowing your fingers to apply pressure way more efficiently. Your thumb is there for support, not to do the squeezing. Make these little adjustments, and you'll be amazed at how quickly your F chord starts to clean up.
For thousands of lessons that break down these techniques and more, check out a TrueFire All Access Trial.
Great technique isn't an accident. It comes from smart, consistent, and targeted practice. Instead of endlessly trying to force the full F chord and getting frustrated, let's use a structured routine that methodically builds your strength and muscle memory. This approach breaks the challenge down into much more manageable steps, ensuring you make real, tangible progress.
The goal isn't just to play an F chord—it's to use it. That means we need to focus on strength, clean transitions, and actually applying the chord in a musical context.
Before you even attempt the full chord shape, let's isolate the part that gives everyone trouble: the barre itself. "Barre push-ups" are a fantastic exercise for building the specific finger strength you need without overwhelming your hand.
Here’s how they work:
Think of this exercise as weightlifting for your fretting hand. It isolates the exact muscles needed for a strong barre and, just as importantly, teaches your hand the difference between tension and relaxation. That’s the key to avoiding fatigue and pain.
This visual guide shows the simple process of identifying an issue, analyzing what's causing it, and then correcting your form.
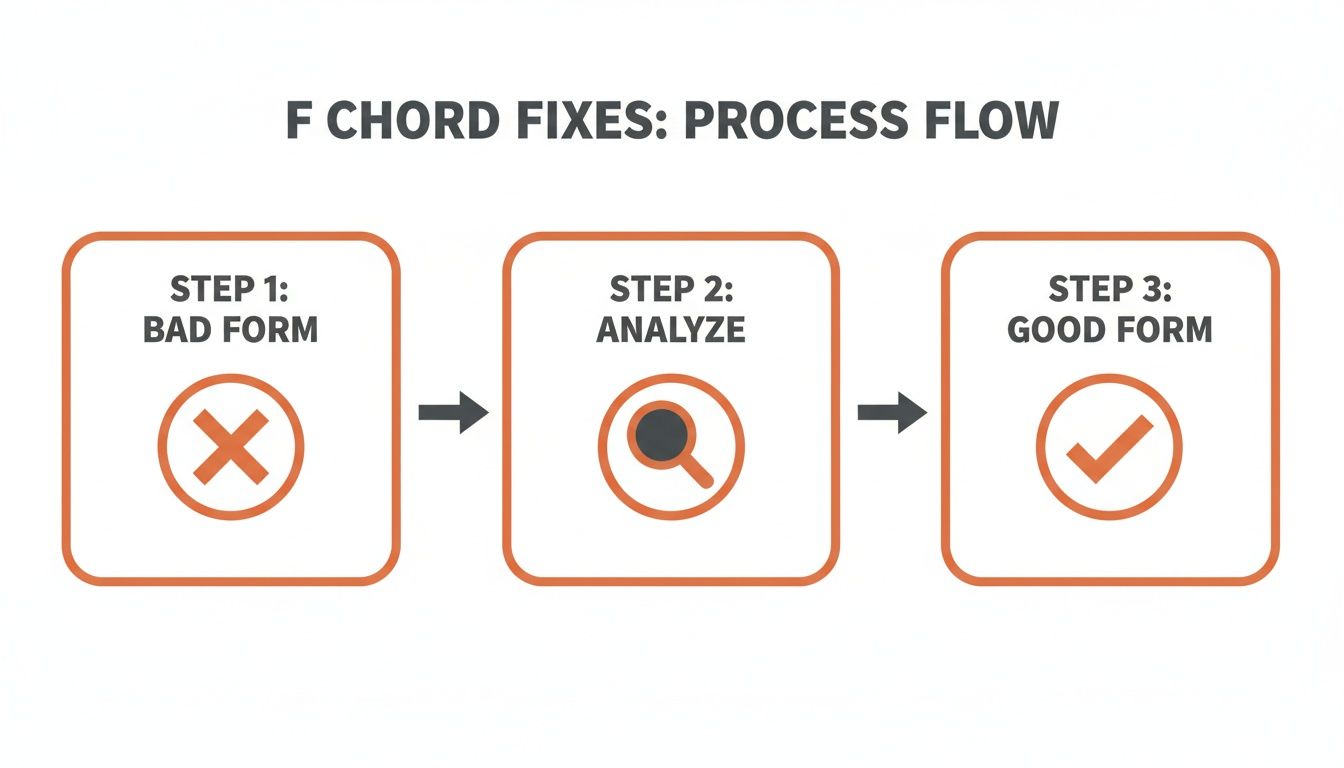
This process highlights that fixing chord problems isn't about brute force. It's about a deliberate cycle of diagnosis and adjustment.
A perfect F chord is pretty useless if you can't switch to it in time with the music. This is where transition drills become absolutely essential for building fluid, reliable muscle memory. Grab a metronome and set it to a crawl—something like 60 BPM (beats per minute).
Start with a common, easy chord pairing, like a C Major going to one of the simpler F variations.
Focus on economy of motion. You want to move your fingers as little as possible to get to the next shape. Once you can nail this for a solid minute, bump the tempo up just a bit. This systematic approach is the fastest way to develop chord changes you can count on. You can learn more about how to build muscle memory and learn guitar chords quickly in our dedicated guide.
Okay, time to make some actual music. Practicing chords within a simple progression transforms a mechanical exercise into a musical one. A classic, and incredibly useful, progression is C - F - G.
This C-F-G (or I-IV-V) progression is the absolute foundation of countless songs. By practicing it, you're not just learning a chord; you're internalizing the very sound and feel of Western music itself.
Set your metronome and practice playing through the progression, giving each chord four beats. Start with a simple F variation. As you gain confidence, work your way up to the full barre.
This works so well because the F chord is one of the most vital chords in modern music. It shows up in over 15% of popular songs, especially those in the key of C, which powers a staggering 18-22% of Western pop and rock tracks since the 1950s. Its critical role in progressions like C-F-G is all over hits from The Beatles' 'Let It Be' to Oasis' 'Wonderwall'.
This structured routine—strength, transitions, and application—will get you playing the F chord much faster and more effectively than just struggling with it in isolation.
Even with a solid game plan, you're bound to run into some specific roadblocks when you’re tackling a beast like the F chord. It happens to everyone. Let's clear the air on some of the most common questions I get from my students. Think of this as your personal troubleshooting guide to get you over those final hurdles.
This is the million-dollar question, right? The honest answer is… it depends. There’s no magic number.
But with focused, daily practice of about 15-20 minutes, most guitar players can get a clean sound out of the simpler F chord variations within a couple of weeks. The key here is consistency, not cramming for hours on a Sunday.
The full six-string barre chord is a bigger mountain to climb. Realistically, you can expect it to take a month or even longer before you can switch to it smoothly in a song. You’re building new muscle memory from scratch, so be patient with yourself and celebrate those small wins. Getting even three strings to ring out cleanly is a victory!
A capo is an amazing tool, but it's a workaround, not a substitute for building a foundational skill. Sure, it can help you play a song in a friendlier key right now, but leaning on it to avoid the F chord will seriously hold you back down the road.
Here’s why: the barre technique you develop for the F chord on guitar is the exact same skill you’ll need for B minor, B flat, G sharp minor, and dozens of other chords that are staples in rock, pop, and blues.
Skipping the F means you're not just avoiding one chord; you're avoiding a fundamental skill that unlocks the entire fretboard. Use a capo when it serves the song, but commit to mastering the barre. Your future self will thank you.
Pain is your body's way of saying, "Stop! Something's wrong." Don't try to be a hero and push through it. Sharp pain almost always points to bad form.
If your hand is hurting, stop playing immediately and check these three things:
Take frequent breaks. Stretch your fingers. The goal is relaxed, efficient technique, not brute force.
Ah, the classic buzz and mute. This is an incredibly common rite of passage when learning the F chord, and it's usually an easy fix once you play detective. The culprits are almost always uneven pressure or sloppy finger placement.
First, check your barre finger. Is it right up against the fretwire, or is it floating in the middle of the fret? Get it as close to the fret as you can without being on top of it. Next, try rolling your index finger slightly onto its bony side—this helps make solid contact across all the strings.
For your other fingers, make sure they’re arched properly, coming down on their very tips. If they’re lying flat, they’ll accidentally touch and mute the strings next to them. To find the problem string, just pluck each string of the chord one by one. When you hear the buzz or thud, make that tiny adjustment until it rings out true.
Mastering the F chord is a journey, but with the right techniques and dedicated practice, you'll turn this major hurdle into a cornerstone of your playing. To get expert guidance on every step of your guitar journey, from your first chord to your most advanced solos, explore the 80,000+ video lessons available with a TrueFire All Access Trial.
